Showing posts with label Sewing. Show all posts

Friday, January 6, 2012

Sketchy Shower Curtains turned Living Room Curtains.

Continuing on my theme of “Curtain Week”—today I will tell you about my curtain selection for this room (picture courtesy of the previous owners before we moved in):

ImageStoreCAADUE5M

Right before we moved into our house I took a wonderful trip to Arizona with my sister, mother and some very dear friends.  It was the best girls weekend EVER.  We had so much fun.  And we did a lot of shopping.

Well, one of the stores that shopped at was Kirklands Home Store.  I have never shopped there before but I fell in love with practically everything in the store.  And I fell in love with this fun shower curtain.

Kirklands

I was looking for some fun curtains to hang in the living room/kids hang out room.  I saw these shower curtains for only $16.99 and new that I could make them into really cute curtains.  And that I could get 2 panels out of each one!  So I bought 3 panels for my 3 windows for a total of $50.97. 

The plan was brilliant—I would just cut each shower curtain in half and hem the raw edge and get some fun hooks and hang them up in my living room.  Easy Peasy.

Well, when I got home and opened up the packaging I knew I had a lot more work to do.  I have NEVER seen such poor quality of sewing in a ready made product.  I could hardly believe it—and HAD to take several pictures to document HOW BAD IT REALLY WAS.

So here are the photos for your viewing pleasure (look really closely at all the details—seam allowances, button holes, hems, etc.):

IMG_1517

IMG_1515

IMG_1513

IMG_1510

IMG_1516

CRAZY right? 

And the crazy thing was that all three panels were all that way!

So I was now back in Washington and couldn’t return them.  And I still loved the fabric.  So I just started picking out all the seams and cutting off all the seams with button holes—till I was left with just the material.  And started from square one.

So I ended up just hemming them all the way around and forgetting the button holes.  Instead I hung them with little clips.  And I think they turned out MARVELOUSLY!  And here is what the room looks like now:

IMG_2601

The only bummer about using a shower curtain is that they are shorter than other curtains (especially when you have to cut off an inch and a half of a lousy button hole job off the top!)  I would have loved for them to be floor length.  But I still love how they turned out!

IMG_2602

And the fun print makes a big impact—as it is usually one of the first things people see as they come in our house.

IMG_2603

I get asked all the time if I made these curtains.  And—because of all the ripping out of seams and cutting and trimming and pain in the neck work I had to do—I say HECK YA!  I did!


Wednesday, January 4, 2012

Master Bedroom Curtains—Adding Grommets

As always, I have so many projects I want to post about.  I thought this week I would focus my posts on some of the window treatments that I bought, made, and did major reconstructive surgery on.

We’ll start today in our Master Bedroom.

Our master bedroom has two enormous windows that let in a TON of sunlight (that is when the sun actually shines here in the northwest!).

This picture is right after we bought the house and were just starting renovations and painting.  This room needed a bunch of dry wall repair (after we took off all the shelving and other things that had been left attached to the walls), new window blinds, a new light fixture and a whole lot of paint.  I will give you all the before and after details in another post—today we are just going to talk about the curtains.

IMG_1382

First of all—I just want to tell you that I bought 12 different sets of curtains that were eventually returned because they were either the wrong color (they didn’t match with our bedding), or they were not room darkening enough (we were waking up when the sun came up at 4 or 5 in the morning!) before we finally settled on these:

Eclipse Samara Blackout Energy-Efficient Curtain from Walmart

Eclipse Samara Blackout Energy-Efficient Curtain

My hubby and I are really happy with the quality and the price of these curtains ($9.77/panel!!!)  However, I was not in love with the rod pocket look—as I wanted to open and close them on a daily basis, and rod pockets can be awkward to open an close often. 

So I tried using curtain clips to hang them from the rod.  I obviously hadn’t ironed them yet when these pictures were taken.

IMG_1741

IMG_1742

I just wasn’t in love with this option either.  I had really wanted a curtain with grommets.  So I decided to see about adding my own grommets.

I found these DIY grommets at Joanns:

Dritz Curtain Grommets 1 9/16" Inner Diameter 8/Pkg Pewter 443-68

But they were $12.99 for 1 pack for the size that I needed.  And I needed 3 packs!  That would make double the price of these curtains!!!

I was bummed and had resigned myself to the fact that I would just have to live with them as is—until I saw that in Walmart’s Fabric section—they had these black plasitcy looking grommets for $5.99!

IMG_1737

I didn’t want the cheap black plastic looking grommets—but I knew that I could fix them with my favorite spray paint that is made for plastic!

I have used this exact spray paint for more projects than I can count.  Here and here are just a couple of examples.

So the grommets come apart into two pieces—the front and the back.  Here all the fronts and backs got a makeover.

IMG_1738

Next I used the template that comes with the grommets, and carefully measured and traced out where I wanted the grommets to go.

Then I simply just cut around my tracing lines.  Then I put the back grommet on the back of my fabric, and the front grommet on the front.  And then I pressed the pieces together and they snapped into place.  All my cut edges are neatly and securely encased inside of the grommets. 

IMG_1739

Then I just repeat those steps 24 more times until all of my panels were done!

Then I gave them all a good pressing and hung them up.

IMG_1752

Now they open and close easily and they look amazing.  And this spray paint is tough as nails.  Its not going anywhere.  We have been opening and closing them every day for months and I have yet to see any signs of wear. 

IMG_1750

AND thanks to the miracles and wonders of SPRAY PAINT--this little transformation only cost me and additional $18 for the grommets instead of $40!

IMG_1751

And that makes me happy.

Sunday, February 27, 2011

Kitchen Curtains--Take 3

WOW!!!  It has been a whirlwind month for me!  I had a couple of weeks where I was down and out recovering from surgery.  We also found, fell in love with, and made an offer on a NEW HOUSE (more to come on that later).  Our van died on us and had to be towed to the mechanic for one last revival (it has 200,000 miles on it) so it can last us another month till we close on our house and then--hopefully we can get a new one.  We have also had family visiting us from out of town--which has been wonderful--and busy!

So--I am finally sitting down to re-cap on a bunch of projects that have been done FOREVER--I just hadn't gotten the time to get them posted!!

So here is project recap #1--Kitchen Curtains--Take 3.

If you will remember, I made new curtains not long ago--and I loved them--until I painted our kitchen back splash!  Then they looked WAY out of place:

I wanted to sew up some curtains to match--but after searching HIGH and LOW--I COULDN'T FIND any fabric that matched!!

But I did find some curtain panels at Target for only $9.99 each.  And they were long enough that I could get four curtains out of 3 panels and still have enough fabric left over for another project (I will show you later).

This is a close up of the fabric:

I love it!!  It has a nice stripe to it and the fabric has a little sheen to it.  Very rich looking!  And the color matches the back splash PERFECTLY!!

So I cut the panels up and did some button holes at the top for the rod to go through--cause I like that look better than just a rod pocket.

And for just $30--I had some new curtains for my kitchen!


And the best part of the whole thing?  My good friend Tracy wanted the old curtains for her house!  So she bought them from me!!  SO I didn't have to waste such cute curtains!!

And I think they look WAY better in her house then they did in mine anyways!


And now, my kitchen truly is complete...


Just in time for us to move into our new house!!

Isn't that just how it goes sometimes!?


Tuesday, January 18, 2011

Bunk Bed Tent

So you might remember that we have 4 children and live in a 1200 square foot house

Needless to say--we live on top of each other.

Two of my boys literally do--live on top of each other...in bunk beds.

Well, my 4 year old--Landon, who lives on the bottom bunk, decided quite a while ago--that he would like some privacy.  (I'd like some too--but in 1200 square feet--none of us get much of that!)

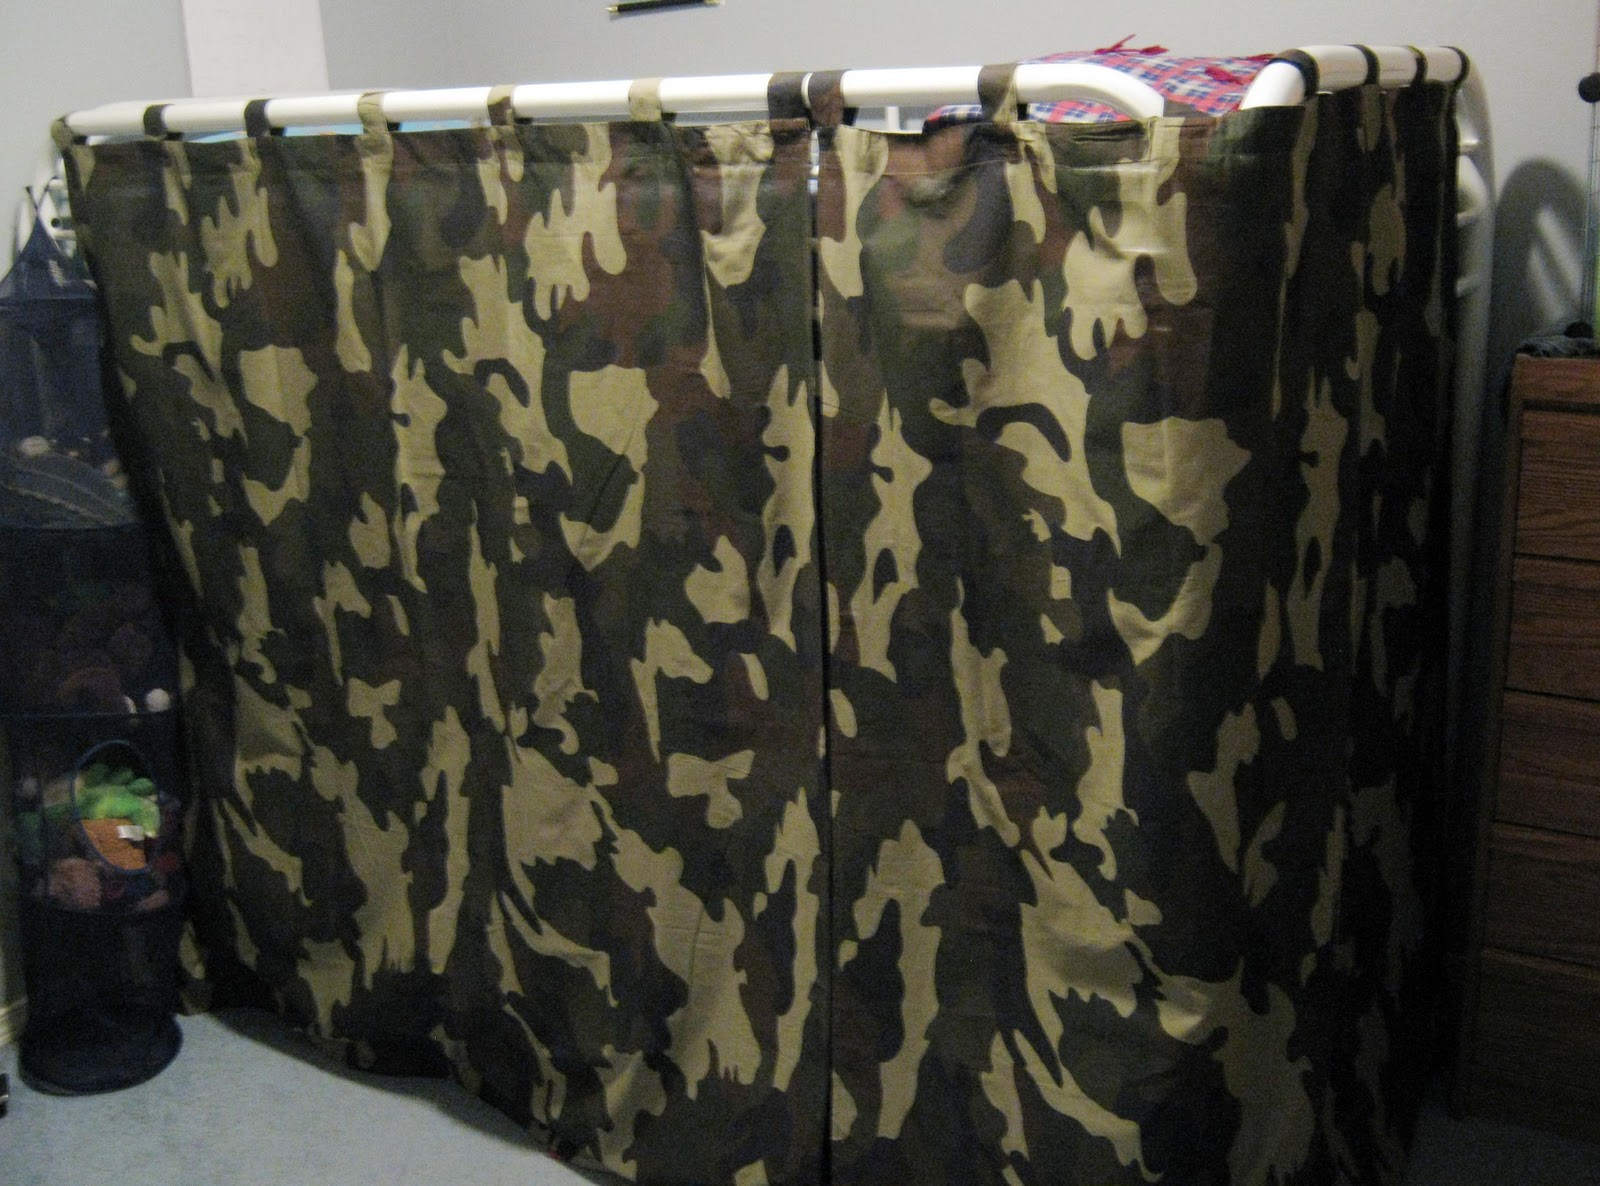
But to give him his PRIVACY we got creative with the blankets and gave him a little shelter for his bottom bunk:


This was supposed to be for just a night or two--but we found that the little guy slept a lot better in his little fort.  So it became kind of a permanent fixture in his room.

But it was kind of a pain in the butt as the blankets would fall down or get pulled off and we would have to tuck them all back in perfectly for the little man to go to sleep.

I had often thought of sewing something more permanent--but it was always a project low on my list until me and my hubby saw these while shopping at Jysks in Canada:


Fun tab top curtains PERFECT for a little boys room and the PERFECT price of just $9.99 per curtain (regularly priced at $19.99 and not even on sale--I just had a question about them and the guy quoted me the wrong price on them--and so they honored that price at the till--SWEET!!!).

How PERFECT is that? It was CHEAPER than I could buy the fabric and it was already hemmed and had the tabs at the top. All I did was cut the tab, tuck under the raw edge and sew it in place. Add some Velcro and hang them up.


Now it is the PERFECT little place for PRIVACY, for FUN and HOPEFULLY for LOTS OF SLEEPING.


OK--maybe its more for fun than for sleeping.


That in my books is $20 well spent.

Linking Up HERE

Tuesday, September 28, 2010

Shade Shirt Wanna-Be

I have several favorite shirts.  And as I have explained in previous posts--If I find something I like--I usually buy SEVERAL of them--just in different colors.  So if you were to parooze (sp?) my closet--you would find little variety in styles--but a little more variety in colors.  (I know--I'm lame that way!) 

Anyhoo, So my very FAVORITE T-shirts (and yes I have 3 of them) are made by SHADE CLOTHING.  (Love those guys!)  And they look like this:


 I have had the shirts for several years--and I was JUST about to order some more when I found out that SHADE IS GOING OUT OF BUSINESS!!!  (Sob!)  So I quickly went online to see if I could order anything before they closed up shop ONLY TO FIND EVERYTHING WAS SOLD OUT IN MY SIZE!!!!  BUMMER!!!

And I have worn the shirts so much that some of them are doing this:

See how the neck line is getting all stretchy and bubbly?  The elasticity in the Spandex is dieing and it is making the shirt look all funny!

 I HAVE to retire these shirts--but I need a replacement--and I can no longer buy one!!  Wah!!

So what is a girl to do? 

I guess I just have to try and MAKE ONE.
I remembered that I had some stretchy knit fabric in my stash that was exactly like the fabric for these shirts.  So I got out the fabric and got out my favorite shirt.

I laid the fabric down first on the fold--then I folded my shirt in half as well and laid it on top of my fabric.

(Now SORRY--I don't have many pictures of what I did--as I was in the ZONE and wanted to get the project done before little people started waking up from their naps--and I didn't know if it would turn out anyway--so I figured I would just sew it up--and if it worked I would HAVE to do it again sometime and THEN I would take some more pictures! )

Next I cut around my shirt back leaving about 5/8" seam allowance.

Then I refolded the remaining fabric and folded the shirt again so that I could do the same thing and cut out the shirt front.

Then I matched shoulder seams and side seams and sewed it up.

Then I finished off the sleeves and the neckline by cutting a 3/4" strip of fabric and folding it in half.  Then I sandwiched the edge of the neckline/sleeves in between the strip of fabric and sewed it in place. 

And that was how I made this:


Ok--So the only modification I made to the shirt from the original Shade Shirt was the sleeves.  They stuck out a little funny after I added the trim around the edges--so I quickly added a little tuck/pleaty thingy on the edge. 


 I just gathered up the fabric and hand tacked it in place. 


Oh--and I used a double needle to hem the bottom of the shirt.  It gives it a nice professional looking edge.
(I may try this on the sleeves as well next time.)


Here is my crazy psycho picture taking face.  I added this for your viewing pleasure and amusement.  You may laugh at my face--but please ignore the crazy hair and no makeup!  It was a work day--what can I say?


And after it is all said and done--I LOVE THE SHIRT!!  It fits JUST LIKE THE SHADE SHIRT!!  It was SO MUCH EASIER than I thought it would be.  I am super happy with how it turned out!  And now I have to go shopping to buy more fabric to make some more!!
(Next time I will take more pictures--I promise!)

Linking up to THESE parties.
Related Posts with Thumbnails