Thursday, March 3, 2011

Master Bedroom Makeover

A while ago I showed you the new bedding we got for Christmas--but I have yet to show you our master bedroom makeover. 

So lets remember where we started:

This is what our room looked like for many years before we added our $1 Headboard: 

Then came the headboard and mirror:


Everything in the room was all coordinated around the blue and green color scheme.

Our lamps--(I already showed you their transformation HERE):


My whole sewing area including the chair:


Pictures on the Wall:


Lets just say that the purchase of new bedding ENTIRELY upset the balance and order of my WHOLE ENTIRE ROOM!!!  I needed to redo everything!!!

So I started with my little sewing chair.  I had left over fabric from my Kitchen curtains.  And it matched PERFECTLY!! 


So I just stapled over the other fabric (even though I actually started to undo all the staples to take it apart and my hubby walked in and asked me why I didn't just put it on top!  I swear that guy is a GENIUS!!  Duh!  Saved me a lot of work!)

I think it looks very elegant.


Close up so you can see the fabric:


Then above my dresser (Which is on the list to get a new coat of paint) I had collected a fantastic little assortment of Chucke Cheese photos.  They are small and Cheesy (get it?) but I love them.  However, they didn't look very elegant on my walls as they were:


So I found some dollar store picture frames (2 for $1) that were the same size.


I spray painted those babies up--as well as my lamp shades.


Then I scanned in the originals into my computer (So I could have a digital copy) and then reprinted them and framed them up.  I really love how they turned out!


Next the curtains were now all wrong--as was the curtain rod and curtain hangy thingies.


So they got a makeover with spray paint too:


I think that the Oil Rubbed Bronze finish looks so much better and matches the sconces I have on either side of my mirror.  AND I totally scored and found these old curtain panels in my closet.  They were from another room and I hadn't seen them in years and just stumbled upon them!  So serendipitous!


So that is my new master bedroom.

And isn't it nice that I got it all done--just in time to move?  Oh well--I'm sure our renters will appreciate the fresh coat of paint on the walls!

Monday, February 28, 2011

OUR NEW HOUSE!!!

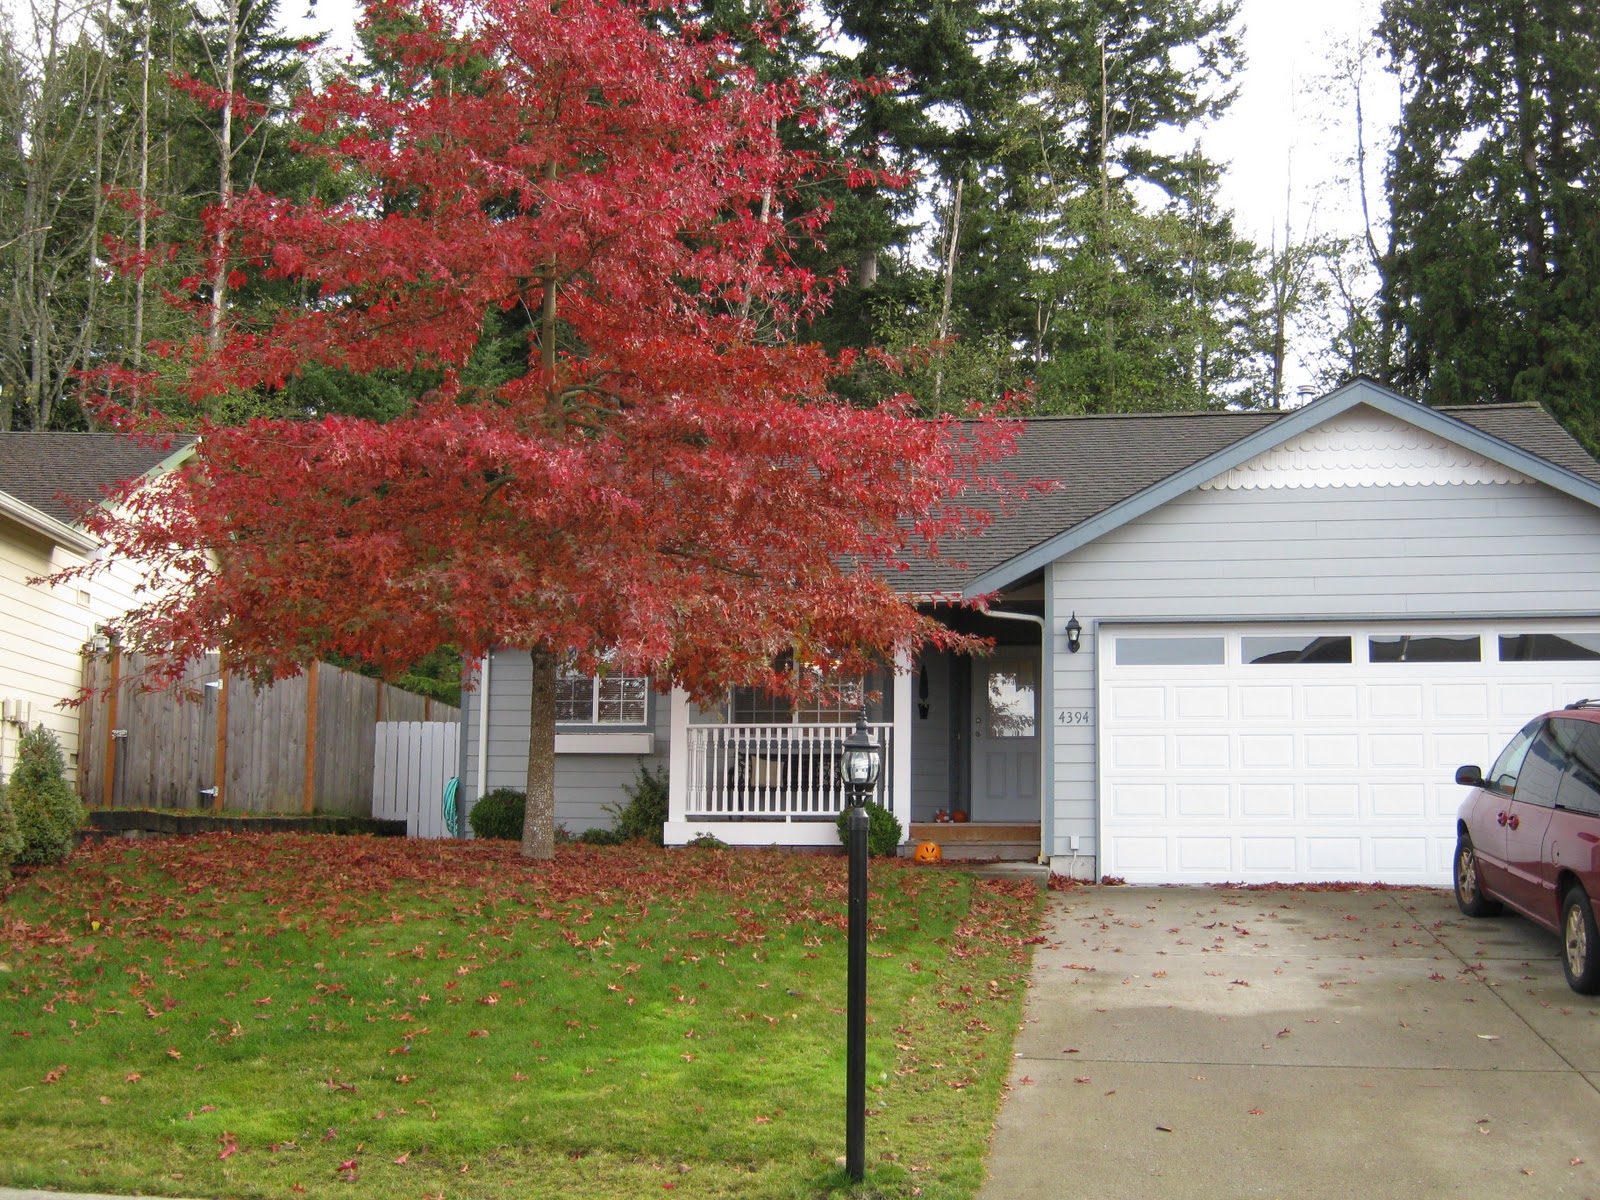
As I have mentioned before--for the past 8 years our family of 6 has been living in this little (1200 square foot) home:


 We have loved our little house--but it is finally time for us to move on to some MORE SPACE!!

So, a few weeks ago we made an offer on this:


This house has 4 bedrooms, 2.5 baths in 2300 square feet.  It is in an AWESOME neighborhood (our house is probably the oldest and smallest in the whole place--all the rest are BIG, BEAUTIFUL homes--Who doesn't love that!?)

And our house is beautiful too.  It just needs a little elbow grease to make it really shine!  We have BIG PLANS for this house.  It may take us several years to afford and accomplish all of them--but when we are done--this place will be spectacular!  I just know it!!

So with no further ado let me introduce you to our soon to be NEW HOME and tell you a little bit about our plans.
(Now remember--we have not taken possession of the house yet--so all these pictures are of the existing homeowners furnishings and decor.)

For the outside we will be painting all the red trim and the exposed cedar shingles a nice neutral brownish/tan color to give the exterior an updated look.  And we will be ripping out a lot of the overgrown landscaping.


The back yard is pretty much perfect already.


This is our front entry way.  BIG plans in here.  White trim throughout.  Refinish hardwoods.  Paint.  Custom coat rack.  etc. etc.


The kitchen is in store for the biggest overhaul.  We plan to rip out the cabinets over the breakfast bar area.  Build a custom hood over the stove.  Install Hardwoods.  Paint cabinets.  Install hardware on cabinets.  Paint up another awesome back splash.  New counter tops down the road.

Then we will take out the desk in kitchen and replace it with a large pantry.  And install a door to close off adjoining room (Which will be my sewing/exercise room--who needs a formal dining room?  Not me--I NEED a sewing room!).

Again--new hardwoods.  New window treatments.  New shades and paint on the light fixture.


In the family room right off the kitchen, we will continue the hardwood floors. Replace fan. Paint trim and fireplace white. Trim out the fireplace with new tile. Paint walls. Spray paint the brass trim on the fireplace.


And like I said--this "formal Dining room" will turn into the perfect spot for my sewing room on one side and my elliptical machine on the other---YAY no more exercising in a cold garage!!  So of course we will paint and change out the lighting in here.


And I certainly don't need a "formal living room!"  Sorry to all of you who love FORMAL spaces.  I think they are WASTED SPACES.  So our "FORMAL LIVING ROOM" will turn into our KIDS HANG OUT ROOM.  It will not be a play room--but rather a room with a comfy couch and a TV and video games and a big coffee table for games and puzzles.  A place where my kids can hang out with their friends.

This room will get a set of french doors in the front and new paint and hopefully some awesome craigslist furniture.


The banister railing leading upstairs will get sanded and stained a dark color to match the new hardwoods--the spokes of the banister will remain white (SPOKES--is that what they are called?).  And we'll have to invest in a LONG ladder to paint the two story entryway.


Both bathrooms upstairs will get new tile and paint.  And we'll figure out something creative to help the light fixtures along.  Frame up the mirror.  And maybe someday new counters.  And we'll see--maybe paint the cabinets too.


And of course all the bedrooms will eventually get a new coat of paint and new decor to match each child's hopes and dreams for their new rooms.

And our new laundry room (Yippee--I will have a LAUNDRY ROOM!!!  No more doing laundry in our freezing cold garage!!!) will also get a new tile floor and some paint and hardware on the cabinets.  Sorry I don't have a picture yet of that room.  But trust me--it is awesome!

So that just about sums it up for now.  We are set to close on March 23rd and take possession on the 27th.  And then the fun REALLY begins! 

Wish us luck!

Sunday, February 27, 2011

Kitchen Curtains--Take 3

WOW!!!  It has been a whirlwind month for me!  I had a couple of weeks where I was down and out recovering from surgery.  We also found, fell in love with, and made an offer on a NEW HOUSE (more to come on that later).  Our van died on us and had to be towed to the mechanic for one last revival (it has 200,000 miles on it) so it can last us another month till we close on our house and then--hopefully we can get a new one.  We have also had family visiting us from out of town--which has been wonderful--and busy!

So--I am finally sitting down to re-cap on a bunch of projects that have been done FOREVER--I just hadn't gotten the time to get them posted!!

So here is project recap #1--Kitchen Curtains--Take 3.

If you will remember, I made new curtains not long ago--and I loved them--until I painted our kitchen back splash!  Then they looked WAY out of place:

I wanted to sew up some curtains to match--but after searching HIGH and LOW--I COULDN'T FIND any fabric that matched!!

But I did find some curtain panels at Target for only $9.99 each.  And they were long enough that I could get four curtains out of 3 panels and still have enough fabric left over for another project (I will show you later).

This is a close up of the fabric:

I love it!!  It has a nice stripe to it and the fabric has a little sheen to it.  Very rich looking!  And the color matches the back splash PERFECTLY!!

So I cut the panels up and did some button holes at the top for the rod to go through--cause I like that look better than just a rod pocket.

And for just $30--I had some new curtains for my kitchen!


And the best part of the whole thing?  My good friend Tracy wanted the old curtains for her house!  So she bought them from me!!  SO I didn't have to waste such cute curtains!!

And I think they look WAY better in her house then they did in mine anyways!


And now, my kitchen truly is complete...


Just in time for us to move into our new house!!

Isn't that just how it goes sometimes!?


Wednesday, February 9, 2011

Painted End Table

It has taken me much longer than I thought to get this project done and up on my computer--but I am happy to say that I am finished!!  My second laminate painting project is complete!

Here is the little end table as it has sat for almost a year.  My dear mother bought if for me at a thrift store for my birthday LAST YEAR.  She wanted to buy me an expensive nicely finished end table that cost a million dollars.  But I wanted this beauty that cost just $9. 

I knew I could make it beautiful.  But for a year it has looked mismatched and out of place.


And it was really not very functional either as it spent most of the year as a big open space underneath.  My hubby just made the little shelf for it right before I took these pictures.


So first I took it all apart.


Then I primed and painted it just like I did HERE--and apparently I didn't take any pictures of me doing any of those things.

Once it was painted I let it cure for a LONG TIME.  Since I used latex paint--it stays tacky for a couple weeks even after it has dried.  I wanted to make sure that it didn't get scratched so I left it in our closet for a couple of weeks to let it cure.

Meanwhile I wanted to make sure that the basket that I use on the top shelf wouldn't continually scratch it as well.  I got this basket at the same time I got the table--at the thrift store for $1.29!!!!  And it fits on the shelf so perfectly!!!


But the bottom could definately scratch up my newly painted surface:


So I took some felt that I had on hand and hot glued it to the bottom of the basket. (I didn't have one big sheet so I just pieces several pieces together--no one can tell).
 

Then I put the whole thing back together and back in its place.


I LOVE IT!!!


And with the new paint and shelf it is not only cute it is also functional!


And I think it fits in the space SO MUCH BETTER!!!


You be the judge.

BEFORE:
AFTER: 

Sorry it took me a year to do the makeover Mom! 

It really is just what I wanted!

Tuesday, January 25, 2011

Painting my Laminate Furniture

So while I was stalking some of my favorite bogs--I came across a couple posts about painting cheapy laminate furniture (THIS one is my favorite and is the one that I followed).  I was OVER JOYED with the idea and prospect of painting cheapy laminate furniture--because my house is FULL OF THE STUFF!

So for my first attempt I chose this lovely little book shelf from ikea.
(It normally is FULL of all of our DVD's and Videos (I forgot to take a picture of it while it was all full)--and yes, we still own a million videos and probably will for a while cause who wants to replace all of them?  And why do we have so many movies?  Because we haven't had and TV for the last 8 years.)

Blah, Blah, Boring
Especially since we got our new couches off craigslist (which you can read about HERE)--everything on that wall is just TAN.

Something had to be done!  And since my hubby didn't want me painting the wall--the furniture is getting the makeover!

So we start by spreading out my sheets (they make excellent drop cloths).  And yes--I am painting it right in my living room--cause it was a million degrees below zero in my garage.


Then I primed it with this TRULY AWESOME PRIMER (designed specifically to go over shiny surfaces WITHOUT SANDING!!!!):

I only did 1 coat of primer (Notice the little green vase thing in the background.  It will get a little makeover too): 

Then I started in with the paint (I used Behr Latex Semi Gloss Paint called Bison Brown)--and I started to have a heart attack because the paint out of the can looked SO HORRIBLE.  Look at the color:


And yes--now that I look back, I must have been crazy to paint with that DARK BROWN PAINT so close to my new to us couches!!!!

But thankfully not a drop of paint got anywhere it wasn't supposed to.  And DOUBLE THANKFULLY the paint dried to the nice rich deep brown that I had wanted.


After 3 coats (2 coats probably would have been fine--but I am anal that way) it was ready to put the shelves back in.  And of course while putting them in--THIS HAPPENED (on EVERY SINGLE SHELF I might add):


But really--you want the shelves to fit tightly--so there is no way to get those guys in there without a little scraping.  Nothing a little touch up paint couldn't fix.

And now they are all filled and looking AMAZING!!!


I know they would be much prettier decorated beautifully with pictures and greenery and cute baskets and such.  But in our 1200 square feet--we only have space for FUNCTIONALITY! 

But at least it is now functional AND beautiful!


I love it from EVERY ANGLE!!


Now--see the WHITE END TABLE between the couches?


Now that I know how easy it is to give my furniture a make over--I have selected this piece to be my next victim!  So hopefully I will have another great makeover very soon!

Related Posts with Thumbnails