
Ok-- Now that my laundry and other mommy chores are finished--I can finish my post about Landon's Toy Story Birthday.
So back to how I made this Pinata:

So I first got my inspiration and idea HERE from Kalleen's blog AT SECOND STREET. (This gal is a genius!)
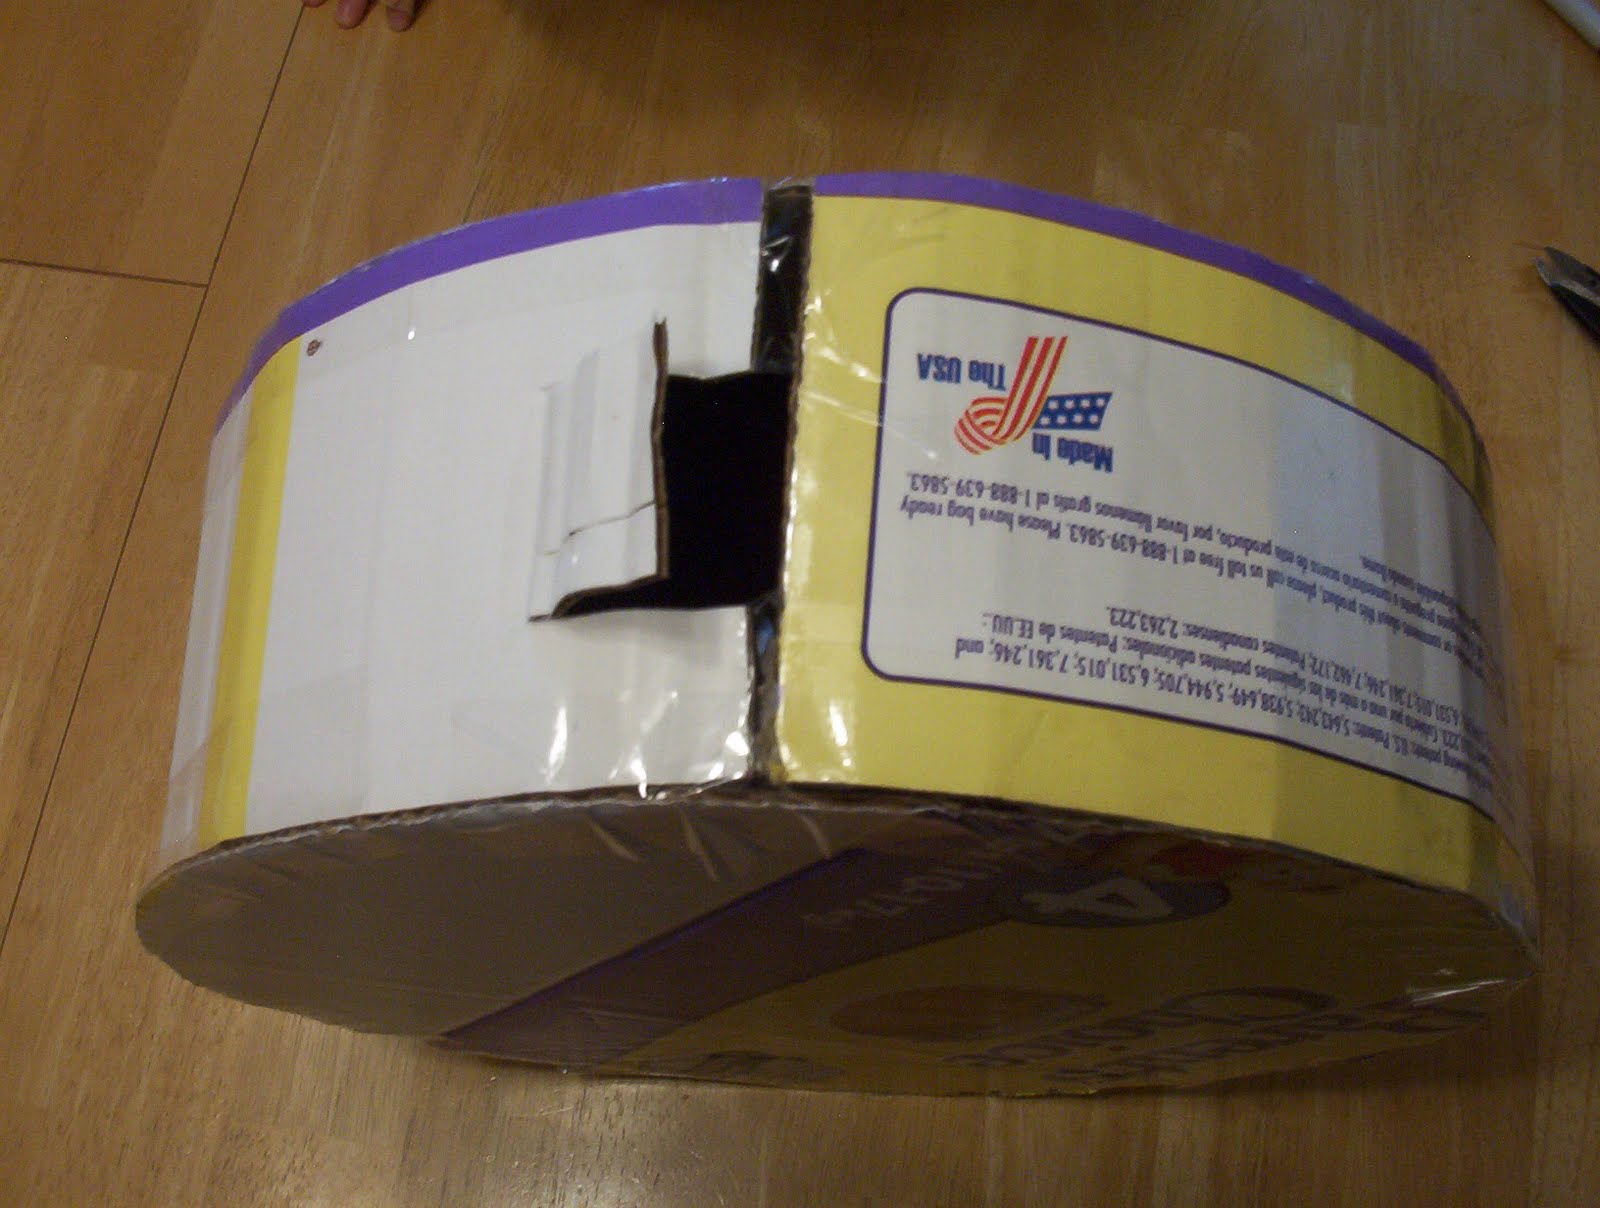
So We start with a cardboard box (at my house those usually come in the form of a Diaper Box).
I decided I wanted a round disc shape for my pinata--so I found the perfect size bowl to trace onto my cardboard.

I cut out two circles--and then just cut all of the box fold tabs off at the fold line (by using these as my sides--I didn't have to do any measuring or anything cause they are already the exact same size as each other.)
Then I taped the sides onto the front and back circles. (If you are going to do this--BE SMARTER THAN ME and put the Diaper Box Writing on the inside NOT the outside!!! It will make it easier down the road when you are trying to cover said box!)
I would also use REGULAR SCOTCH TAPE. I used packing tape--not covering the whole thing--I tried to leave spaces to create weak points so that it would break when hit--but the packing tape is pretty strong--so this was a little hard to break. So just use the regular stuff--it will work better.

Then I cut a little door at the top for the candy to go in.
Next I went around covering the Diaper Box Surfaces with paper--to create a base for your decorations to go on top. You would still do this even if you had DONE IT RIGHT and put the writing on the inside--but it would be easier to cover as some of my writing kinda showed thru (It didn't end up mattering anyways--as all the other decorations covered it--but STILL--You could sleep better at night knowing that you did it the RIGHT WAY!)

Next I ran a line of white glue where I wanted my crepe paper to go--and then I just lay your crepe paper on top and kind of fold it and scrunch it into gathers as I went.
(See the blasted writing? AARRGGG!)

Then I repeated that step covering all the sides.

Next I used the same clip art that I used for the invites (I like the idea of using Clip Art--that way you can make a pinata for ANY occasion or theme!). I printed out two copies--nice and large so it would fit on the pinata front and back.

I glued them on the center of the circles.

Next I did the same technique as before and glued and scrunched all the way around both the front and the back making a border around the picture.

And this is it!
(Oh yeah--my hubby poked some holes in the top to string wire thru to hang--but I don't have a picture of that).

Then my little helpers filled the pinata (and their belly's) with candy and prizes.
(Oh--and if you have never filled a pinata before--just a note--it is best to use soft/chewy candy instead of suckers and other hard candies. We learned that the first year when all of the broken shards of candy came out of the pinata all over our garage floor. So go with soft candy!)

Now that the pinata was finished--I moved on to the cupcakes.
HERE I found the greatest idea and tutorial for AWESOME Toy Story Cupcakes.
They Look like this:

And this:

Next we did a little decorating--I loved using the toys we already have!!
How much easier can you get?

To serve the food, I just used simple red cups, plates and napkins from the dollar store. I rarely buy the ones with characters on them--cause I hate having the extras floating around my cupboards--and then when I want to take a plate of cookies to a friend or neighbor--they have to get them on a princess plate! So I go with plain colors.

I also printed out a coloring page of all the Toy Story characters. Each child chose and colored one and then we taped them on to the back of their chairs and played musical chairs. When the music stops--instead of taking out a chair and making some one "OUT" (Which doesn't EVER go well with a bunch of 4 year olds), I choose a character name out of a hat and the person who happens to be sitting in that chair gets a prize. We keep playing till everyone gets a prize. Fun Times.

Then we hung the pinata on our swing set outside.

Next we lined everybody up youngest to oldest so everyone gets a turn to have a whack at it.

Then everyone had a whack at it!
Some with blind folds--some without.
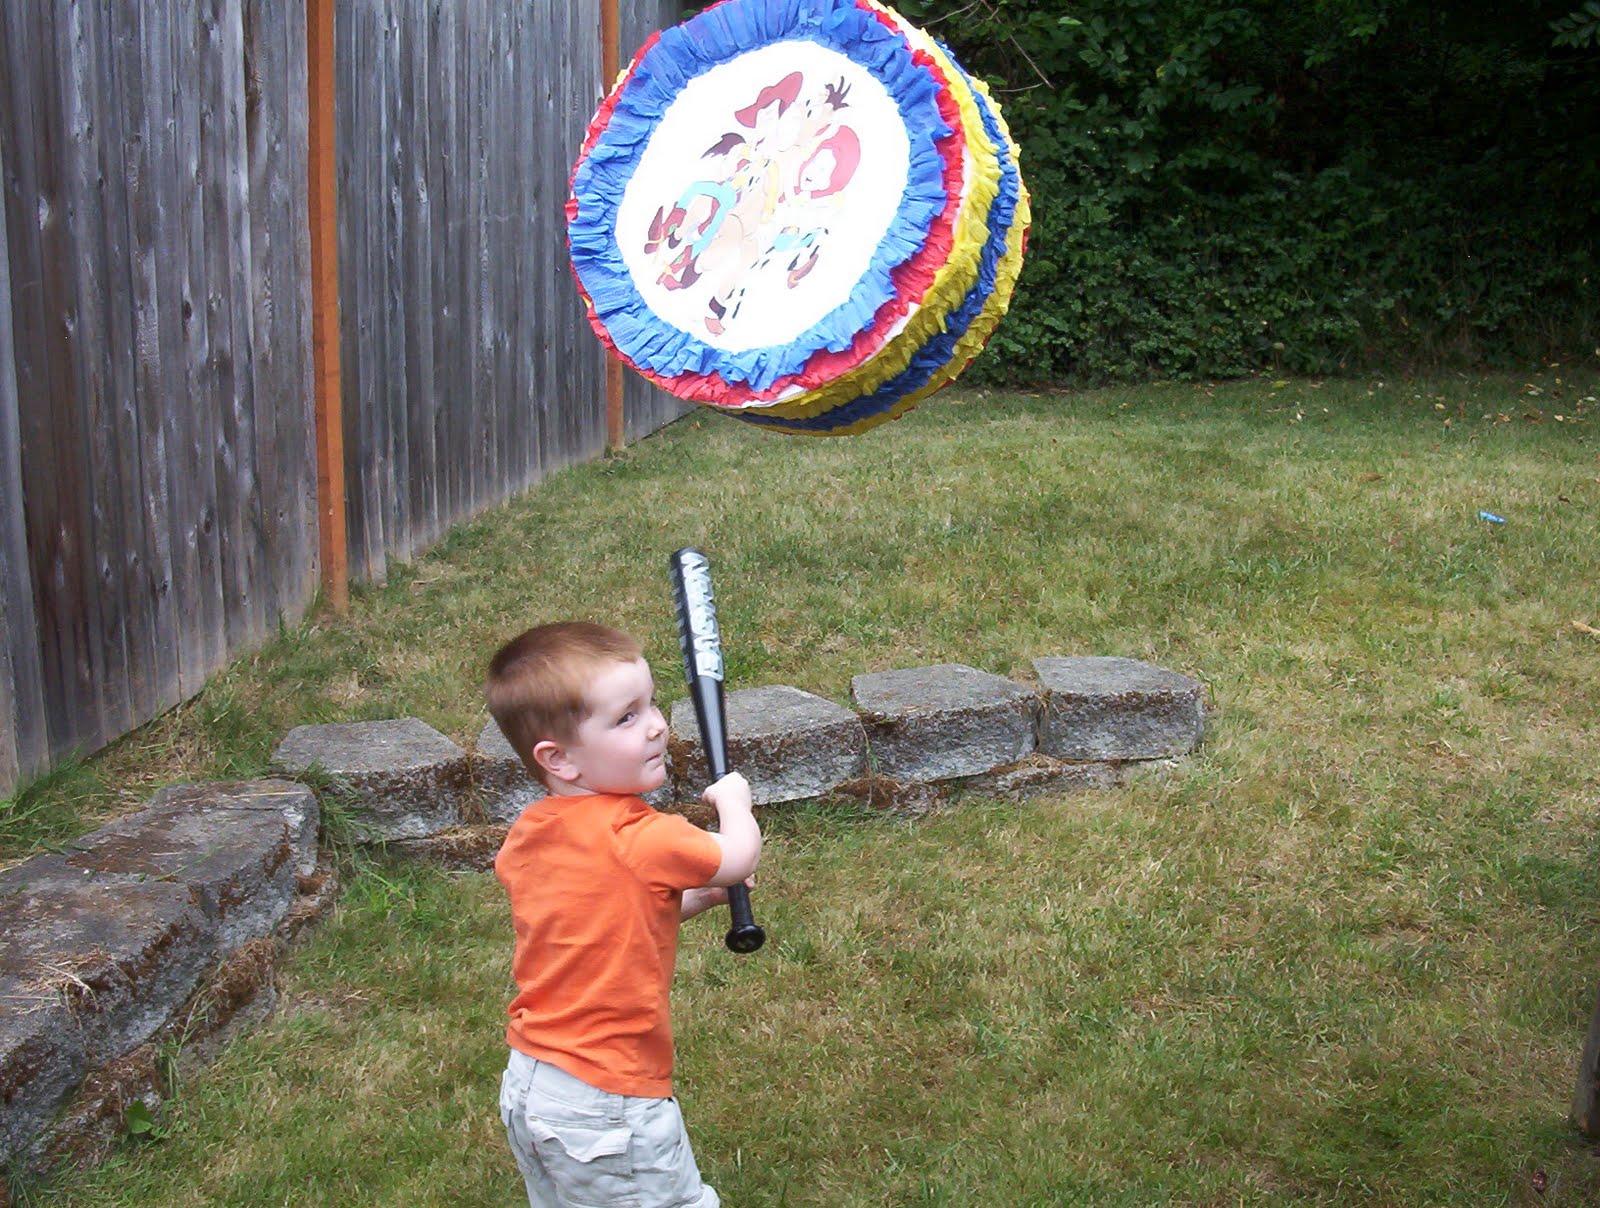


Once it was broken we passed out little bags for everyone to gather the goodies.

Next it was time for presents.

And cake:

Meanwhile little brother was laying claims on the new toys!
He had a death grip on these babies--let me tell you!

And whew! Another birthday can be crossed off the list for another year!


How creative is this!!?! It's the greatest idea and such an adorable party!! I'm loving your blog and I'm so excited to be your newest follower! I would also like to invite you to my link party/giveaway every Friday at FrouFrouDecor! I love new friends and hope to see you there!
ReplyDelete~Terrell @ FFD~
Those cupcakes are too cute! And your pinata turned out amazing.
ReplyDeleteThanks for linking up with Sugar & Spice.
great ideas, you're such a crafty Mommy!!!
ReplyDeleteLooooove those cupcakes! What a cute party for a cute boy!
ReplyDeleteWow!! i love the cupcake idea!! i to am about to throw a Brithday party for my 3 and soon to be 5 yr old son and daughter, ive been planning this party for about 2 months already .The closer i get to the DATE the more stressed i get.=[ I also like the idea of the musical chairs. AWESOME
ReplyDeleteLOVE the pinata...you have explained it the best!! I've opted to make a pinata this year instead of buying 2 (one for my son and daughter who's birthdays are Aug and Sept)...will sooo be checking in to your blog!
ReplyDeleteWhen you need fast food packaging, cans of electrical appliances, car accessories, motorcycles, cans for accessories, etc. You need to support the details of the structure, specifications and materials. box, carton to suit the item you intend to achieve and high aesthetics. The necessary information is printed on top of the package, the shell of the item with probability and color must be reasonable so that the message is not lacking and achieve the highest aesthetic and beauty.
ReplyDeletebao bì màng Metalize
in hộp cứng bánh kẹo
in bao bì tại hà đông
in hộp tráng kim